
WordPress is a great content management system that makes it relatively simple to publish content on your website. Plus it’s free software. But what’s the point of publishing great content and having a website if people never find it? That’s where search engine optimization (SEO) comes in to play to get your website and wonderful articles indexed and showing up in search results. There are many steps to solid SEO, and one of them is making sure search engines like Google are able to properly visit your webpages (crawl your site). That’s where Google’s Webmaster Tools (also free) can help. Here’s how to get it set up on your WordPress site.
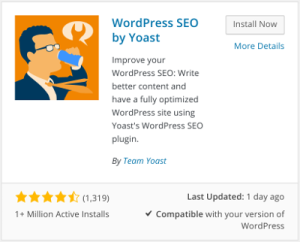
Step 1: Install the Yoast SEO plugin on your WordPress site
 This step not only makes verifying that you control your website (a step Google requires) a breeze, it also adds a great SEO plugin to your WordPress installation.
- Log in to your WordPress site and get to the Dashboard
- Click “Plugins” from the left navigation column and then click the “Add New” button up top. You can also hover your mouse over the “Plugins” link in the left column and access the “Add New” link.
- In the “Search plugins” box in the upper right, enter “Yoast SEO” and then hit the enter key.
- You should get a bunch of plugin results, the first one titled “WordPress SEO by Yoast“. Click the “Install” button for that plugin and follow the rest of the installation instructions. WordPress should download the plugin, put it in the plugins folder on your web server, and then ask you to “activate” it — activate it.
- Done. We’ll get back to this plugin in a bit after setting up the Google Webmaster Tools account.
Step 2: Create a Google Webmaster Tools account and add your site
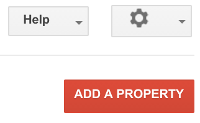
- Go to Google Webmaster Tools. If you don’t already have a Google Account, you can create one. Then log in to the webmaster tools dashboard.
- Once you log in to the webmaster tools dashboard, click the “Add Property” button in the upper right. This will prompt you to enter your domain name. I usually like to leave out the “www” part of the domain and just put “mydomain.com”
Step 3: Verify Your website
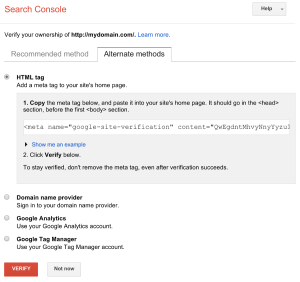 After you add your domain, Google will ask you to verify that you own the website, or at least have proper access to it. Google doesn’t want you adding just any old website to your Webmaster Tools account. My workflow at this step is to usually have two browser tabs or browser windows open: one for Google Webmaster Tools and one for the WordPress dashboard.
- You should be on a page with two tabs: one for “Recommended method” and the other for “Alternate method”.
- Click the “Alternate Method” tab, and select the “HTML tag” option.
- Copy that entire string of meta tag information. We’re going to be pasting that into the Yoast SEO plugin settings at your WordPress site.
- In another browser window or tab, go to your WordPress dashboard and find the “SEO” link toward the bottom of the left navigation column. Click that SEO link.
- This will take you to the SEO plugin’s main settings page that has a tabbed interface, with one of the tabs labeled “Webmaster Tools“. Click into that.
- In the field labeled “Google Search Console“, paste in that verification code you copied from the Google dashboard and then click “Save Changes“. It should look similar to the following image after you save your changes (the code will be different):

Step 4: Confirm verification code with Google and you’re done
One last step:
- Go back to the Google Webmaster Tools dashboard, the same place you copied that verification code, and click the red “Verify” button.
- Google will ping your website, see that the new verification code is properly showing up in the HTML source of the website, and you’re good to go.
- After a day or two, log back into the Webmaster Tools dashboard and you should start seeing stats.
What Next?
The work isn’t done with just getting your website verified with Google’s Webmaster Tools. There’s crawl reports to look over so that any missing pages, broken links, or index errors can be found and fixed. You’ll also need to get your website’s XML sitemap configured and added to Webmaster Tools which helps Google know what pages should be indexed. And most importantly is getting your SEO meta tags created for all your content pages. Way too much to cover in a blog post. If you need help with any of this, Contact us for your SEO needs!
